You must first complete Showing Colors before viewing this Lesson

Adding Sleep

Introduction

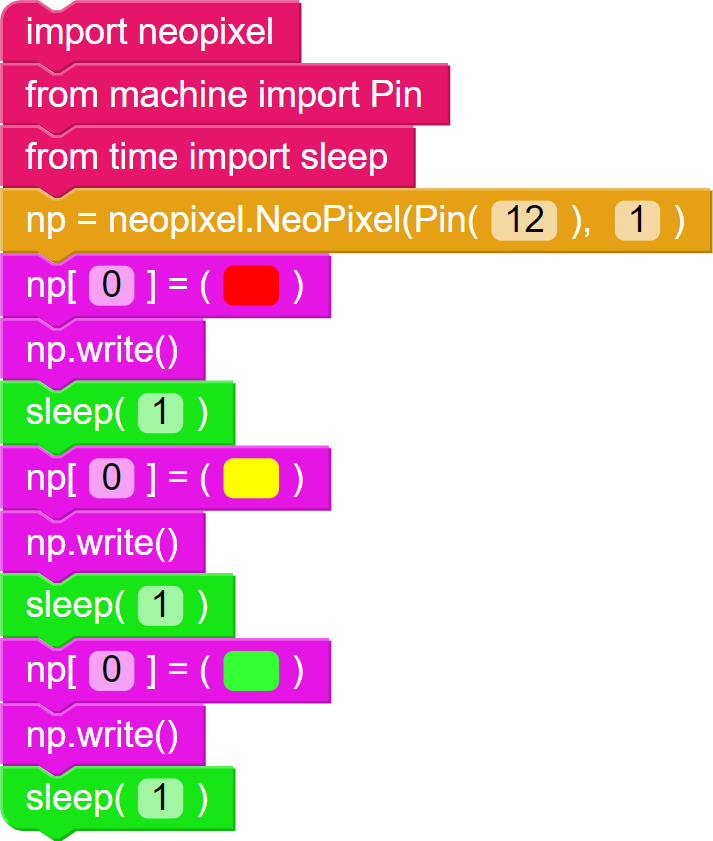
It’s time to add a little automation to our traffic light! The Little Python is a computer. As such, it reads through code and executes them REALLY quickly! As such, it is oftentimes essential to let it wait a bit before executing its next line of code. As such, we’ll be learning about “sleep” and why it is as essential for computers as it is for human beings!

Components Needed

  • Little Python Brain
  • A tablet/phone/laptop
Steps

1

Importing the Sleep Function

Drag this block next to our from machine import Pin block so we can tell the Little Python that we will also be using the “sleep” function from its timing capabilities!

2

Using the Sleep Block

From the Operators category, simply drag the sleep(1) block to the end of our last block! This lets the Little Python wait for a bit – 1 second, in this case! – before executing the next line of code.

3

Adding the Next Colors in the Sequence

Now that our libraries are ready, it’s time to set up the NeoPixel! The Pin(12) denotes the pin that our NeoPixel is connected to while the 1 represents the number of “pixels” that we have. Let’s leave it as is for now!

The Complete Code

Lesson tags: basic, color, neopixel
Back to: Beginner > Traffic Lights
© 2020 Little Python

CONTACT US

    Log in with your credentials

    or    

    Forgot your details?

    Create Account