You must first complete Taking User Inputs before viewing this Lesson

Conditional Statements

Introduction

Now that we’ve learned how to take user inputs, we’ll now be learning how to control outputs with these inputs!

Components Needed

  • Little Python Brain
  • A tablet/phone/laptop
Steps

1

Setting up the NeoPixel

Drag the blocks we need to set up the NeoPixel, namely the import neopixel, from machine import Pin, and neopixel setup blocks.

2

Another User_Input block

Drag a User_Input block inside your workspace. This time, we’ll be storing a color. Name the variable as color then have the prompt ask you to select a color.

3

The if condition block

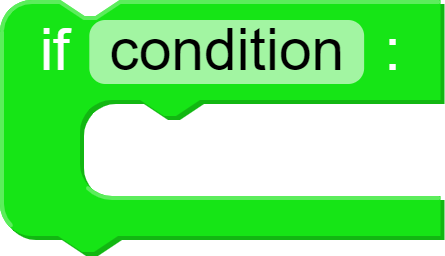
From the Operators category, drag this block inside our workspace.

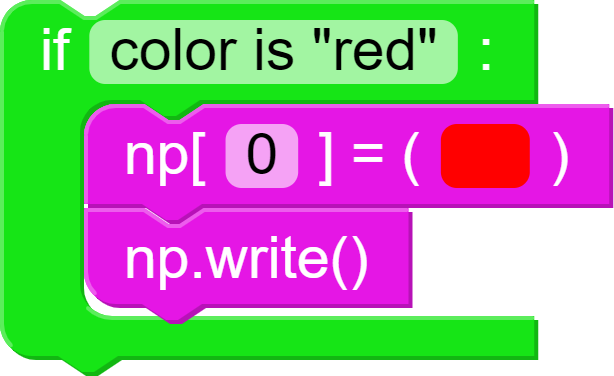
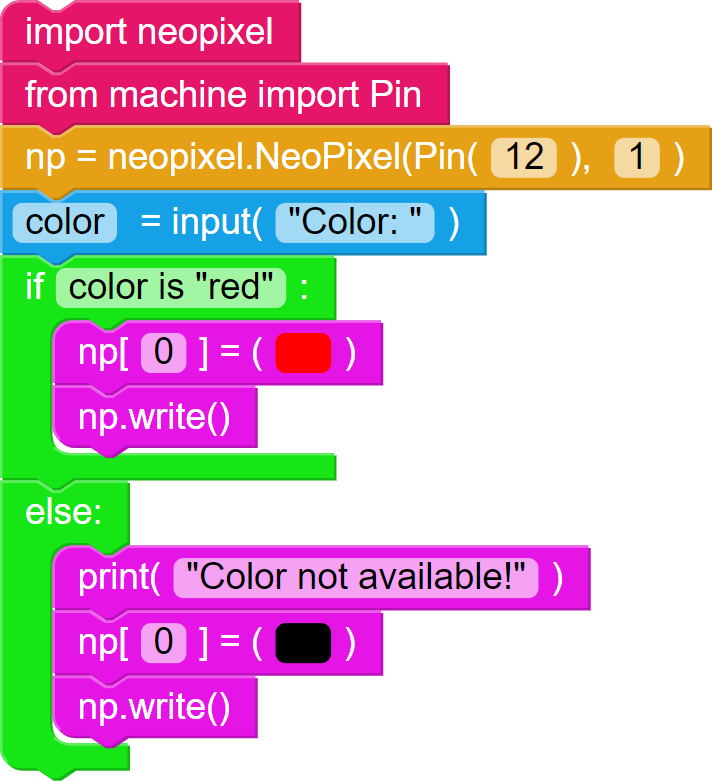
What it does is pretty simple: it checks a condition then when that condition is fulfilled, the code inside is executed. For example, if we set the condition as color is “red” then it will execute the code inside if the user has responded with “red” to the input prompt color.

4

Putting the code inside the if color is "red" block

Now, we want the NeoPixel to display red when the user inputs “red”. We can do that by adding the NeoPixel setting blocks inside the if condition block.

4

The else block

Since the if condition block only executes the code inside only when the condition we specified is met, if we put a color other than “red”, then our code would not do anything!

The function of the else block is to have a “default” code to execute when the condition for the previous if condition block is not met. Let’s try it out!

5

The code inside the else block

What this will do is turn off the NeoPixel when we put a color other than red as well as give us a nifty response indicating that we chose an invalid option!

The Complete Code

Back to: Beginner > Coder's Light Switch
© 2020 Little Python

CONTACT US

    Log in with your credentials

    or    

    Forgot your details?

    Create Account