You must first complete Introduction to For Loops before viewing this Lesson

Animating Text

Introduction

Welcome to the Intermediate Course! For our first project, we will be looking at how to work with pixels on the OLED screen of the LP Brain. We’ll begin by learning about how to display them as well as what the blocks to display them are and what they do. 

Components Needed

  • Little Python Brain
  • A tablet/phone/laptop
Steps

1

For i in range

Another for loop we can use is the for i in range block. However, compared to the previous for loop, a for i in range block deals mainly with numbers and elements inside a list or string.

  • start – indicates which part of the list to start on (we usually set this to 0)
  • end – indicated which part of the list to end on
  • step – how many elements to go through per iteration (usually set to 1)

2

Modifying the "range"

We need to set the start to 0 and the step to 1. However, what does the len(text) mean?

3

Understanding the len() function

Basically, a len() function takes the LENGTH of a string or list. In this case, as we’ve seen last lesson, the “Hello World” string has 10 letters and 1 whitespace resulting in a total of 11 characters.

By using the len() function on the “Hello World” text, we can get this number automatically without manually counting them!

4

Changing the oled.text() block

This might be a lot to take in at first! So let’s take it one parameter at a time.

5

String element: text[i]

It’s easy to understand this part by seeing it in action. 

As shown in the picture to the side, text[0], text[1], and text[2] returns the first (‘H’), second (‘e’), third (‘l’) letter of the string. The only weird part here is computers usually count starting from 0! So the FIRST letter is denoted by  by text[0].

The i in the text[i] loop will then be changed each loop from 0, 1, 2, and so on until len(text), which is 11, when the code will end.

6

x position: i*12

The x position on the oled.text() block is where the string is displayed.

This is merely a formatting code so that our text displays nicely. i*12 means i multiplied by 12. So on the first repeat of the loop, it’s 0*12 = 0. On the second repeat, it’s 1*12 = 12. This means that the x position of the text that we are printing increments by 12 each repeat of the loop.

7

The complete for loop

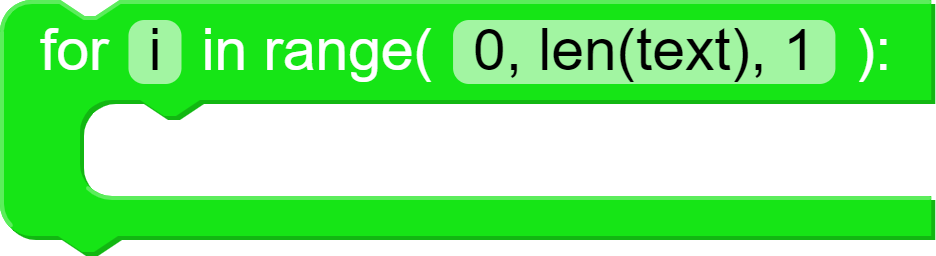
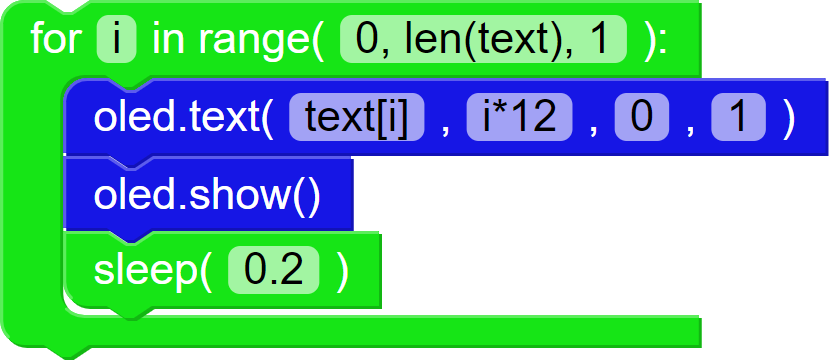
Now that we have a basic understanding of how it works, we can break it down a bit!

During the first iteration of the loop

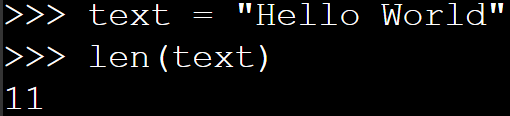
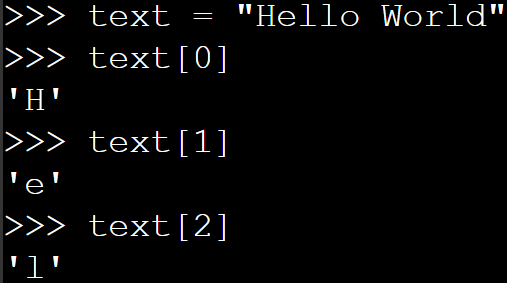
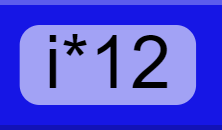
i = 0 | text[0] = ‘H’ | 0*12 =  0

This is equivalent to displaying

oled.text(“H”, 0, 0, 1)

During the second iteration of the loop

i = 1 | text[1] = ‘e’ | 1*12 =  12

This is equivalent to displaying

oled.text(“e”, 12, 0, 1)

During the first iteration of the loop

i = 2 | text[2] = ‘l’ | 2*12 = 24

This is equivalent to displaying

oled.text(“l”, 24, 0, 1)


And so on…

The Complete Code

Run this code a few times and try to change the i*12 to different numbers!

© 2020 Little Python

CONTACT US

    Log in with your credentials

    or    

    Forgot your details?

    Create Account